Acclimating Flooring Before You Install It

One of the most common reasons a new floor fails has nothing to do with the product or the installer. It is skipped acclimation. Wood, laminate, and even some vinyl flooring need time to adjust to the temperature and humidity of the room where they will live. Skip this step and you risk gaps, buckling, or popped seams within months.

What Acclimation Actually Does

Flooring is manufactured and stored in conditions that rarely match your home. A plank that arrives from a humid warehouse will shrink as it dries out indoors, while one from a dry storage unit will swell. Acclimating lets the material reach equilibrium with its new environment before it is locked into place, so the inevitable movement happens before installation rather than after.

How to Do It Properly

The process is simple but requires patience. Bring the flooring into the actual room of installation, not a garage or basement, and let it sit for the time the manufacturer specifies.

  • Leave boxes in the install room for the recommended period
  • Open or cut the boxes so air can circulate around the planks
  • Keep the room at normal living temperature and humidity
  • Stack planks loosely rather than in tight, sealed bundles

Timing and Conditions

Solid hardwood often needs a week or more, while many engineered and laminate products ask for two to three days. The exact number matters less than the conditions. The room should be at the temperature and humidity it will normally hold once you are living there, with the HVAC running as usual. Acclimating to an empty, unheated house gives you a false reading.

It feels like a frustrating delay when you are eager to finish a project, but those few days are the cheapest insurance you can buy. A floor that has settled into its surroundings will lie flat, close tight, and stay that way for years.

Getting Grout Lines That Actually Stay Clean

Few things age a tiled floor faster than dingy grout. The tile itself can look brand new while the lines between it turn gray, blotchy, and impossible to scrub back to their original shade. The good news is that most grout problems are preventable, and even neglected grout can usually be restored without ripping anything out.

Why Grout Gets Dirty

Standard cement grout is porous. It drinks up spills, mop water, and the fine grit that gets tracked in on shoes. Once that material settles into the tiny pores, ordinary cleaning only lifts the surface and leaves the embedded grime behind. Mildew adds to the problem in bathrooms, feeding on soap residue in the damp lines.

Sealing Is the Real Secret

The single most effective habit is sealing your grout after installation and then once a year afterward. A penetrating sealer fills the pores so liquids bead up instead of soaking in, buying you time to wipe spills away before they stain.

  • Wait until new grout has fully cured, usually 48 to 72 hours
  • Apply sealer with a small brush directly to the lines
  • Wipe excess off the tile face before it hazes
  • Test the seal yearly by dripping water and watching it bead

Restoring Lines That Are Already Stained

For grout that is already discolored, an oxygen-based cleaner left to sit for ten minutes lifts far more than spray-and-wipe products. Scrub with a stiff nylon brush, never metal, which scratches the grout and tile glaze. If the color is permanently uneven, a grout colorant or refresh pen can recoat the lines in a uniform shade and seal them at the same time. It is a slow afternoon of work, but it makes a tired floor look freshly laid without the cost of replacement.

Choosing the Right Underlayment for a Quieter Room

Underlayment is the thin layer that sits between your subfloor and your finished flooring, and it does far more than most people realize. The right choice can soften footsteps, smooth out minor imperfections, block moisture, and make a hard floor feel noticeably warmer underfoot. The wrong choice can void a flooring warranty or leave you with a hollow, drum-like sound in every room.

Match the Underlayment to the Floor

Different flooring types have different needs. Laminate and engineered click floors usually require a foam or felt pad to cushion the locking joints and reduce noise. Luxury vinyl plank often comes with an attached pad, and adding a second layer underneath can actually cause the planks to flex and separate.

  • Laminate: foam or felt for cushioning and sound
  • Engineered wood: felt or cork, depending on the install method
  • Luxury vinyl: usually none, unless the manufacturer specifies it
  • Tile: cement board or an uncoupling membrane, never foam

Moisture and Concrete

If you are installing over a concrete slab, moisture is the real enemy. Concrete wicks water vapor upward for years, and that moisture can warp wood or grow mold under vinyl. Look for an underlayment with a built-in vapor barrier, or lay a separate polyethylene sheet first. Tape the seams so the barrier is continuous across the whole room.

Sound Ratings Worth Knowing

For apartments and upstairs rooms, pay attention to the IIC and STC ratings, which measure how well a floor blocks impact and airborne sound. A higher number means quieter neighbors below. Cork and rubber underlayments tend to perform best here, and many condo boards require a minimum rating before they approve any new floor. Spending a little more on acoustic underlayment is one of the cheapest ways to make a home feel calmer.

Recoat or Replace? Newcastle Timber Floor Guide

Old timber floors reach a point where you have to decide: sand and recoat, or pull them up and replace? The right call saves thousands and years of regret. This guide gives you a clear condition test, the honest pros and cons of each path, and the specific signs that tip the decision one way or the other, so you are not relying on a hunch.

The core question: how much timber is left?

Solid and engineered timber can only be sanded so many times before there is nothing left to work with. Every sand removes a thin layer. Solid boards usually have several sands in them over a lifetime; engineered boards have a much thinner wear layer and far fewer. So the first real question is not how the floor looks, but how much sound timber sits above the tongue-and-groove joint or the plywood core.

When sanding and recoating is the right move

Choose refinishing when the floor is structurally sound and just looks tired. Good signs include:

  • Boards are firmly fixed, not loose or bouncing.
  • Wear is in the finish and top surface, not deep gouges through the timber.
  • There is enough thickness above the joint to sand safely.
  • No widespread water damage, rot, or movement.

Refinishing is dramatically cheaper than replacement, keeps the original character, and creates far less waste and disruption. A recoat (a light screen-and-coat without full sanding) is cheaper again when the timber is fine and only the finish is dull.

When replacement is the honest answer

Replace when the timber itself has failed or run out. Clear signs include:

  • Boards sanded so many times they are thin or the joints show through.
  • Rot, insect damage, or persistent water damage across an area.
  • Cupping or movement caused by an unresolved moisture problem.
  • Widespread loose, cracked, or missing boards.

In Newcastle’s coastal homes, subfloor damp is the usual culprit behind rot and movement. If the moisture problem is not fixed, a new floor will fail the same way, so replacement always comes with fixing the cause underneath.

Recoat vs full sand vs replace

Option What it does Best when Relative cost
Recoat (screen and coat) Refreshes the finish only Timber sound, finish dull Lowest
Full sand and refinish Removes finish and top timber Scratches, stains, worn look Mid
Replace New floor installed Rot, movement, timber spent Highest

A real scenario

A homeowner in Mayfield had 80-year-old hardwood that looked beyond saving: grey, scratched, and stained. A test sand in a cupboard revealed solid, healthy timber under the worn finish, with plenty of thickness left. A full sand and refinish brought it back for a fraction of a replacement quote. In the same house, one water-damaged section near a former laundry leak had gone soft and had to be replaced and blended in. Same floor, two different answers, decided by condition, not appearance.

Common mistakes and how to fix them

Judging by looks. A grey, ugly floor is often perfectly sound. Do a small test sand in a hidden spot before deciding.

Over-sanding an already thin floor. Check board thickness first. Sanding through to the joint ruins the boards.

Replacing without fixing the cause. If damp or a leak destroyed the old floor, fix it before laying a new one or you repeat the failure.

Sanding engineered timber like solid. Its thin wear layer allows only a light sand, sometimes none. Confirm the layer thickness before starting.

Decision checklist

  • Check board thickness and how many sands remain.
  • Do a small test sand to see the timber under the finish.
  • Inspect the subfloor for damp, rot, and movement.
  • Separate localised damage (repairable) from widespread failure (replace).
  • Fix any moisture source before committing either way.
  • Get quotes for both recoat and replacement to compare honestly.

Conclusion and next step

Most tired timber floors are worth saving; most failed ones are not worth patching. Your next step is a five-minute test sand in a hidden corner plus a look at the subfloor. Those two checks answer the recoat-or-replace question more reliably than any quote.

FAQ

How many times can a timber floor be sanded?

Solid timber usually tolerates several full sands across its life, depending on how much thickness sits above the joint. Engineered timber allows far fewer because of its thin wear layer. Always check thickness before assuming there is room.

What is the difference between a recoat and a full sand?

A recoat lightly abrades the existing finish and adds a fresh coat without removing timber, so it only works when the wood is sound. A full sand strips finish and a thin layer of timber to remove scratches, stains, and deep wear.

Can I refinish just one damaged area?

You can replace and blend a damaged section, but matching colour and finish to an aged floor is tricky. Often a full-floor sand after the repair gives the most even result.

My floor looks grey and ruined. Is it gone?

Not necessarily. Grey, worn surfaces are frequently just aged finish over healthy timber. A test sand usually reveals sound wood underneath and saves you a needless replacement.

References

  • Australian Timber Flooring Association (ATFA) — guidance on sanding, recoating, and timber floor care.
  • Standards Australia — Australian Standards for timber flooring finishing and installation.

Newcastle Timber Floors: Stop Cupping & Gapping

If your timber floorboards have started to curl up at the edges or open small gaps between them, the cause is almost always moisture, not poor timber. In Newcastle’s coastal climate, humidity swings hard between a damp winter and a dry, air-conditioned summer. This guide explains what is happening inside the wood, how to tell cupping from gapping, and the concrete steps to stop it coming back.

What cupping and gapping actually are

Wood is hygroscopic. It absorbs moisture from the air and releases it, and it changes size as it does. Across the width of a board this movement is significant; along its length it is tiny. That single fact explains both problems.

Cupping

Cupping is when the edges of a board sit higher than its centre, so the floor feels like a row of shallow valleys. It happens when the underside of the board is wetter than the top. The damp face swells, the dry face does not, and the board curls. In Newcastle homes the usual sources are a poorly ventilated subfloor, a concrete slab still giving off moisture, a plumbing leak, or a bathroom that never fully dries.

Gapping

Gapping is the opposite. Boards shrink across their width and pull apart, leaving lines you can slip a coin into. It shows up most in late summer when reverse-cycle air conditioning runs for weeks and drops indoor humidity well below what the timber was installed at. Some seasonal gapping is normal and closes again in winter. Permanent wide gaps mean the timber dried far past its installed moisture content.

Why Newcastle’s climate makes it worse

Two things stack up locally. First, the humidity range is wide, so timber that sits comfortably in June can be starved of moisture in January. Second, many older Newcastle houses sit on subfloors close to the ground with limited cross-flow ventilation, and salt-air dampness lingers underneath. A floor can look perfect on install day and move months later purely because the air changed.

A real scenario

A homeowner in Merewether laid solid spotted gum over a suspended subfloor. By the second winter, edges were cupping near the rear wall only. The timber was fine. The problem was a blocked subfloor vent behind a new deck, which trapped humid air under one end of the room. Clearing the vent and adding a second one let the underside dry over the following months, and most of the cup relaxed on its own. No sanding was needed until it had fully settled.

How to diagnose before you fix

Do not sand a cupped floor while it is still cupped. If you flatten it wet, it will dry, shrink, and cup the other way (crowning). Work in this order:

  • Confirm the direction. Lay a straightedge across the boards. Edges high means cupping; a domed centre means crowning.
  • Find the moisture source. Check the subfloor with a moisture meter, look for leaks, and feel whether the underside is damp.
  • Fix the source and wait. Improve ventilation, repair leaks, and give the timber weeks, not days, to re-balance.
  • Only then decide whether sanding is needed at all.

Common mistakes and how to fix them

Sanding too soon. The single most expensive error. Wait until moisture readings across the floor are stable and even before touching a sander.

Blaming the timber. Cupping is a moisture symptom, not a defect. Replacing boards without fixing the source just repeats the fault.

Running the air conditioner flat out in a new floor’s first summer. Extreme drying opens gaps fast. Ease into it and consider keeping indoor humidity moderate.

Ignoring the subfloor. Blocked or too-few vents are behind a large share of cupping cases in older Newcastle housing. Clear them and add more if airflow is poor.

Prevention checklist

  • Keep subfloor vents clear and add extra ventilation if the underside stays damp.
  • Fix leaks and seal wet areas before they reach the floor.
  • Aim for a fairly steady indoor humidity rather than big swings.
  • For new installs, let boards reach the home’s own moisture level before laying.
  • Wipe spills quickly and avoid wet-mopping timber.
  • If a board cups, find the water first, sand last.

Conclusion and next step

Cupping and gapping are messages about moisture, not permanent damage. Your next step is simple: get under the house or check the slab, find where the water is coming from, and fix ventilation before you spend a cent on sanding. Solve the cause and the floor usually settles itself.

FAQ

Will a cupped floor flatten on its own?

Often, partly. Once the moisture source is fixed and the underside dries to match the top, many boards relax over several weeks or months. Any residual unevenness can then be sanded flat.

Are small seasonal gaps a problem?

No. Thin gaps that open in a dry, air-conditioned summer and close again in winter are normal timber movement. Only wide, permanent gaps signal that the wood dried too far.

Can I stop it with the right finish?

A finish slows moisture exchange but does not stop it, especially from the unsealed underside. Ventilation and controlling the water source matter far more than the coating.

Does this affect engineered timber too?

Much less. Engineered boards use a cross-layered core that resists width movement, which is why they cope better with humidity swings. Solid timber is the most reactive.

References

  • Australian Timber Flooring Association (ATFA) — guidance on timber floor performance and moisture.
  • Standards Australia — Australian Standards covering timber flooring installation and moisture content.

Why Your Hardwood Floor Squeaks (and How to Quiet It)

A squeaky hardwood floor is rarely a sign of serious damage, but the noise can be maddening once you start noticing it. The sound comes from movement: a board rubbing against a nail, a subfloor lifting off a joist, or two planks shifting against each other as the wood expands and contracts with the seasons.

What Causes the Noise

Most squeaks trace back to one of a few sources. The fasteners holding the subfloor to the joists loosen over time, leaving a small gap. When you step on that spot, the wood drops, then springs back, dragging across the nail shaft. Humidity swings make this worse, which is why floors often go quiet in summer and noisy in winter.

  • Loose subfloor-to-joist connections
  • Nails that have worked free of the framing
  • Gaps between the subfloor and the finished planks
  • Seasonal shrinkage from dry indoor air

Fixing It From Above or Below

If you have an unfinished basement or crawlspace, the easiest fix is from underneath. Have someone walk on the noisy area while you watch for movement at the joist. A hardwood shim tapped gently into a gap, with a bead of construction adhesive, often silences the spot without any visible repair upstairs.

When you can only work from above, locate the joist with a stud finder and drive a trim-head screw through the flooring into the framing. Predrill to avoid splitting the plank, and fill the small hole with matching wood filler. For carpeted areas, specialty squeak-stop kits let you drive a breakaway screw through the carpet without leaving a mark.

Living With Wood

Some seasonal noise is normal and not worth chasing. Keeping indoor humidity in a stable 35 to 50 percent range does more to prevent squeaks than any single repair, because it limits the constant swelling and shrinking that loosens fasteners in the first place. A simple humidifier in winter can keep an old floor remarkably quiet.

Flooring Over Old Floorboards in Newcastle Terraces

Victorian and Edwardian terraces across Newcastle sit on suspended timber floors, and laying new flooring straight over those old boards is where many DIY jobs go wrong. Cupped boards telegraph through, squeaks return, and laminate clicks apart. This article shows how to assess, level and secure old floorboards so the new floor sits flat, quiet and stable. You will finish with a clear prep sequence you can follow room by room.

Why old floorboards fight your new floor

These boards were laid over a hundred years ago, often square-edged pine that has cupped, twisted and shrunk. Add decades of pipe runs, notched joists and old nail holes, and the surface is rarely flat. A rigid new floor laid on an uneven base will flex at every high and low point, which is what causes clicks, gaps and squeaks.

There is also the void below. Suspended floors breathe through airbricks, and that ventilation must stay open. Whatever you lay on top must not trap moisture rising from the underfloor space, or the old boards will start to rot from beneath.

Assess before you decide the method

Walk the room and note movement, squeaks and obvious dips. Lay a long straightedge or spirit level across the boards in several directions. If the gap under it is small, a plywood overlay may be enough. If boards rock or are badly cupped, they need fixing or planing first.

The prep sequence that works

Order matters. Do these in sequence and the floor will hold.

  • Secure every loose board. Screw down squeaking or springy boards into the joists, not just the gaps. Screws hold where old cut nails have worked loose.
  • Locate services first. Before screwing, find water pipes and cables that run in the void. A stray screw through a pipe is a costly, classic mistake.
  • Deal with cupping. Lightly plane or sand proud edges so nothing rocks.
  • Overlay with plywood. For laminate, engineered wood or vinyl, a 6mm to 9mm plywood layer screwed down at close centres gives a flat, stable base and stops the old board pattern telegraphing through.
  • Keep ventilation open. Do not seal the void airtight. Airbricks must stay clear.

Plywood overlay vs direct laying

Approach Best for Watch out for
Direct over boards with underlay Floors already flat and solid Cupping and squeaks come through
Plywood overlay then floor Uneven or cupped old boards Adds height at doors and thresholds
Lift and relay original boards Restoring a period timber floor Labour-heavy; needs matching boards

A real Newcastle example

In a Gosforth terrace, a homeowner clicked laminate straight onto cupped pine boards with only a thin foam underlay. Within weeks the joints near the bay window popped apart because the boards there dipped by several millimetres. Relaying with a 9mm plywood overlay screwed down first solved it: the base was flat, the laminate locked properly, and the springy feel disappeared. The extra day of prep was the difference between a floor that failed and one that held.

Common mistakes and how to fix them

  • Skipping the flatness check. People assume old boards are flat because they look it. Fix: use a straightedge in several directions before choosing a method.
  • Nailing or screwing blind. Hitting a pipe or cable in the void. Fix: trace services and mark joist lines first.
  • Sealing the underfloor void. Trapping damp under a new floor rots the old timber. Fix: keep airbricks clear and use breathable build-ups where possible.
  • Ignoring door clearance. An overlay plus new floor raises height and jams doors. Fix: plan to trim door bottoms and adjust thresholds.

Action checklist

  • Check flatness with a straightedge across the whole room.
  • Locate pipes and cables before fixing anything.
  • Screw down every loose or squeaking board into the joists.
  • Plane proud, cupped edges flat.
  • Overlay with plywood if the base is uneven.
  • Keep airbricks and underfloor ventilation clear.
  • Plan for the added height at doors and thresholds.

Conclusion and next step

A suspended timber floor can carry a beautiful new surface, but only if the old boards are flat, secured and still able to breathe. Your next step: before ordering flooring, run a straightedge across the room and decide whether you need a plywood overlay. That single check sets up everything that follows.

FAQ

Can I lay laminate directly over old floorboards?

Only if the boards are already flat and firmly fixed. If they cup or move, add a plywood overlay first or the joints will fail.

What thickness of plywood should I use?

For overlaying floorboards, 6mm to 9mm is common, screwed down at close centres. Thicker ply resists telegraphing but adds more height.

How do I stop the squeaks first?

Screw the loose boards down into the joists, not just along the edges. Screws hold better than the original cut nails that have worked loose.

Will overlaying trap damp under the floor?

It can if you seal the void. Keep airbricks clear so the underfloor space still ventilates, which protects the old timber.

My new floor will be too high for the door. What do I do?

Plan for it. Trim the bottom of the door and adjust the threshold strip to suit the finished floor height.

References

The British Standards Institution (BS 8201, on timber and wood-based floor coverings) and manufacturers’ subfloor-preparation guides set out accepted practice for overlaying and levelling. Follow the specific product’s installation instructions.

Best Flooring for a Humid Newcastle Home

Choosing flooring in Newcastle means planning for moisture. Coastal humidity, damp subfloors, and long air-conditioned summers all push timber and timber-look products to move, swell, or lift. This article compares the four options most people weigh up (engineered timber, hybrid, laminate, and solid timber) so you can match the floor to your room, your budget, and your climate rather than guessing.

Why moisture is the deciding factor here

Every floor product has a moisture tolerance. Get it wrong and you pay for it: swollen edges, lifting joins, or cupping. In a Newcastle home the risk comes from three directions at once. Air humidity swings between seasons, subfloors near the ground stay damp, and wet areas like kitchens and bathrooms add localised exposure. The right product is the one that stays stable across all three.

The four main options compared

Engineered timber

A real timber wear layer bonded to a cross-layered plywood core. The core resists the width movement that makes solid timber cup, so it handles humidity swings well while still looking and sanding like real wood (within the limits of the wear layer). It is the strongest all-round choice for most Newcastle living areas, at a mid-to-high price.

Hybrid

A rigid composite plank, usually with a stone-plastic or wood-plastic core and a printed timber-look surface. It is genuinely water-resistant, so it suits kitchens, laundries, and homes where spills and damp are a worry. It clicks together as a floating floor and copes with subfloor moisture better than any timber product. The trade-off is that it is not real wood and cannot be refinished.

Laminate

A high-density fibreboard core with a printed and laminated top. Hard-wearing and affordable, but the fibreboard core is the weak point. Standing water or steam swells the edges and the damage is permanent. Water-resistant laminates exist, but in a humid coastal home they still ask for more care than hybrid.

Solid timber

Beautiful, long-lived, and refinishable many times. It is also the most reactive to moisture, so it needs a dry, well-ventilated subfloor and stable indoor humidity to stay flat. In the right Newcastle home it is superb; in a damp one it is the riskiest choice.

Quick comparison

Option Moisture tolerance Refinishable Best for Relative cost
Engineered timber Good Yes, limited times Living areas, whole home Mid to high
Hybrid High (water-resistant) No Kitchens, wet-prone homes Low to mid
Laminate Low to moderate No Budget, dry rooms Low
Solid timber Lower, needs stable conditions Yes, many times Dry, well-ventilated homes High

A real scenario

A family renovating a weatherboard cottage in Hamilton wanted solid timber throughout. The subfloor sat low with poor airflow and read damp on a moisture meter. Rather than fight it, they used engineered timber across the living areas for the real-wood look and hybrid in the kitchen and laundry where spills were likely. Two years on, no cupping and no lifting. Matching the product to each room, not chasing one material everywhere, is what saved the job.

Common mistakes and how to fix them

Buying on looks alone. Two floors can look identical and behave completely differently in damp. Ask about the core, not just the surface.

Ignoring the subfloor. A great floor over a wet subfloor still fails. Test moisture and fix ventilation first.

Using laminate in wet zones. Its fibreboard core swells permanently. Use hybrid where water is likely.

Skipping the moisture barrier on slabs. Concrete releases moisture for a long time. A slab that is not properly dry or protected will damage timber above it.

How to choose, step by step

  • Test subfloor and slab moisture before you shortlist anything.
  • Map your rooms: mark wet-prone zones separately from dry living areas.
  • For damp or wet areas, favour hybrid.
  • For living areas with a real-wood look, favour engineered timber.
  • Only choose solid timber if the subfloor is dry and well ventilated.
  • Confirm the product’s water rating and warranty in writing.

Conclusion and next step

There is no single best floor for Newcastle, only the best floor for each room’s moisture reality. Your next step is a moisture check of your subfloor or slab. That one reading tells you whether solid timber is even on the table, or whether engineered and hybrid are the safer path.

FAQ

Is hybrid flooring really waterproof?

Its rigid core is water-resistant and shrugs off spills and damp far better than timber or laminate. Water can still get through joins over time, so it is best described as highly water-resistant rather than fully sealed.

Can I put engineered timber in a bathroom?

It is not the ideal choice for a room with standing water and steam. For bathrooms and laundries, hybrid is the safer pick. Engineered timber shines in living areas and bedrooms.

Does solid timber ever make sense in a humid area?

Yes, when the subfloor is dry and well ventilated and indoor humidity stays reasonably stable. In those conditions it performs and lasts beautifully. The problem is only damp, poorly ventilated homes.

Why does the same laminate fail in one house but not another?

Usually the subfloor. A dry, sealed base keeps laminate stable, while a damp one feeds moisture into the fibreboard core and swells the edges.

References

  • Australian Timber Flooring Association (ATFA) — product guidance for engineered, solid, and timber-look floors.
  • Standards Australia — Australian Standards for flooring installation and subfloor moisture.
Subfloor Moisture in Newcastle Flooring: Test First

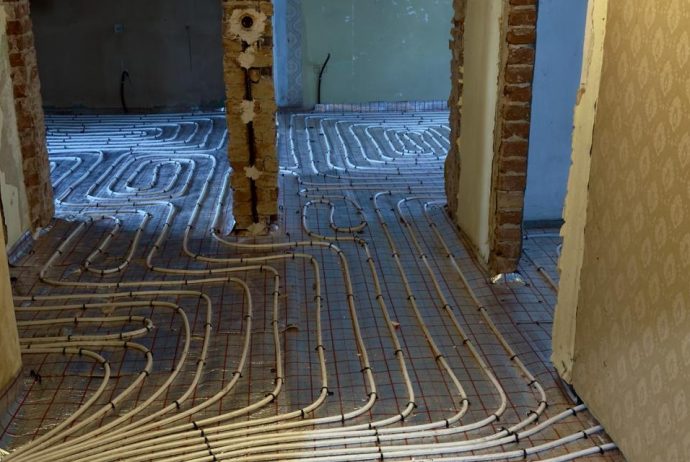
If your new floor cupped, lifted or smelled musty within months, the subfloor was almost certainly too wet when you laid it. This is one of the most common flooring failures in Newcastle’s older housing stock. This article shows you how to find moisture before it ruins a floor, how to read the readings, and what to do about each cause. You will finish with a practical testing routine you can run yourself.

Why Newcastle subfloors hold moisture

Two things stack up here. First, a lot of Tyneside housing is Victorian or Edwardian with solid ground floors that were never

Engineered vs Solid Wood Flooring in Newcastle

In Newcastle’s damp, changeable climate, the choice between engineered and solid wood flooring decides whether your floor stays flat or ends up with gaps and cupped boards. This article explains how each type reacts to moisture and heat, where each one belongs in a Tyneside home, and how to avoid the fitting mistakes that cause most failures. By the end you will know which to buy for each room and why.

The core difference that matters

Solid wood is a single piece of timber. It swells and shrinks across its width as humidity changes, and Newcastle’s swing between damp winters and dry, heated interiors is exactly the kind of movement that opens joints in summer’s opposite season and cups them in winter.

Engineered wood is a real hardwood top layer bonded to a plywood or HDF core, with the layers running in alternating directions. That cross-layered build resists movement far better. It is not immune to moisture, but it is far more stable when the air keeps changing, which is the normal condition in the North East.

Why stability, not looks, should lead the decision

The wear layer on a good engineered board is genuine oak, ash or walnut, so once fitted you cannot tell it from solid by eye. The difference is entirely in behaviour. Choosing on appearance alone is why many people pick solid wood and then fight movement for years.

When to use each

Situation Better choice Why
Ground-floor solid slab Engineered Handles residual slab moisture better; can float over a membrane
Underfloor heating Engineered Stable through heat cycles; solid tends to gap
Kitchen or hallway Engineered Copes with humidity swings and spills
Upstairs bedroom, stable air Either Low moisture risk; solid can be sanded many times
Period restoration, nail-down to joists Solid Traditional look and long refinishing life

The refinishing trade-off

Solid wood’s real advantage is longevity of surface. It can be sanded back and refinished many times over decades. Engineered can be sanded too, but only a limited number of times depending on how thick the top layer is. A 4mm to 6mm wear layer can usually take two or three sandings; a thin 2mm layer, roughly one light sanding. If you want a floor for the next forty years and moisture is not a threat, solid still has a case.

A real Newcastle example

A couple in Jesmond fitted solid oak in an open-plan kitchen-diner with underfloor heating. By the second winter the boards had visible gaps you could slide a coin into, because the heating cycle repeatedly dried them out. They replaced it with engineered oak of the same colour, floated over an insulating underlay. The gaps disappeared and the look was identical. The heating, not poor timber, was the deciding factor, and engineered was simply the right tool for that room.

Common mistakes and how to fix them

  • Putting solid wood over underfloor heating. Movement is almost guaranteed. Fix: use engineered rated for UFH and follow the maximum surface temperature.
  • Skipping acclimatisation. Both types need to adjust to the room’s humidity first. Fix: store boards flat in the room, unopened boxes broken open, for the time the maker states.
  • Leaving no expansion gap. Wood needs room to move at the edges. Fix: keep the perimeter gap the manufacturer specifies, hidden under skirting or beading.
  • Ignoring the subfloor moisture. Even stable engineered wood fails over a wet slab. Fix: test moisture and add a membrane before laying.

Action checklist

  • List each room by moisture and heating risk.
  • Default to engineered for ground floors, kitchens, hallways and any UFH.
  • Consider solid only for stable upstairs rooms or period nail-down work.
  • Check the wear-layer thickness if you want future refinishing.
  • Acclimatise boards and confirm subfloor moisture before fitting.
  • Set the correct expansion gap around the whole perimeter.

Conclusion and next step

For most Newcastle rooms, engineered wood is the lower-risk choice, with solid reserved for dry, stable spaces where long-term refinishing matters. Your next step: walk each room, note heating and moisture, and match the floor to the room rather than buying one product for the whole house.

FAQ

Is engineered wood real wood?

Yes. The visible surface is genuine hardwood. Only the core beneath is layered ply or HDF for stability.

Can engineered wood be sanded and refinished?

Yes, but a limited number of times set by the wear-layer thickness. Thicker top layers allow more sandings.

Which is better for underfloor heating?

Engineered, clearly. Its cross-layered build stays stable through heating cycles that tend to open gaps in solid wood.

Is solid wood ever the right choice in Newcastle?

Yes, in dry upstairs rooms without underfloor heating, or in period restorations where traditional nail-down fitting and decades of refinishing are wanted.

Do I still need to worry about damp with engineered wood?

Yes. It is more forgiving but not waterproof. A wet subfloor will still damage it, so test moisture first.

References

Guidance from the British Standards Institution (BS 8201) and published installation instructions from wood-flooring manufacturers cover acclimatisation, expansion gaps and underfloor-heating limits. Follow the specific product’s documentation.