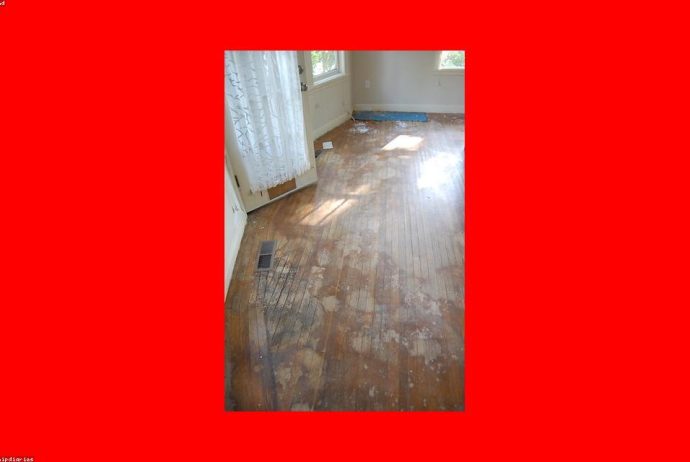

Managing Moisture Under Suspended Timber Floors in Older Homes

Walk into almost any Victorian or Edwardian terrace across Newcastle and there is a good chance the ground floor is built the same way: timber joists resting on low sleeper walls, spanning a shallow void that separates the boards from the bare earth below. It is a clever bit of building for its time, but it only works when air can move freely through that void. When it cannot, moisture builds, timber softens, and the beautiful new floor you have just paid for starts to cup, smell musty, or grow a fringe of mould along the skirting. Understanding how these floors are supposed to breathe is the single most useful thing a homeowner in the North East can learn before laying anything new.

How a suspended timber floor is meant to work

The whole system depends on a current of air passing under the boards. Airbricks set into the external walls draw fresh air into the void on one side of the house and let damp air escape on the other. That constant, gentle movement keeps the relative humidity around the joists low enough that the timber stays dry and stable. Below the joists sits the oversite, usually a layer of ash, rubble, or a thin concrete cap over the ground. The oversite is not a damp-proof membrane in the modern sense, so ground moisture is always rising into the void to some degree. The ventilation is what carries it away before it can settle into the wood.

When people describe a cold, “breathing” floor as a fault, they have it backwards. A slightly draughty void is doing exactly what it was designed to do. The problems begin when that airflow is blocked, and in a city with our rainfall and clay-heavy ground, blockages are extremely common.

The everyday things that choke the airflow

Most damp problems under a suspended floor are not dramatic. They are the accumulation of small, well-meant changes made over decades. A few of the usual culprits are worth knowing by name:

  • Airbricks painted over, rendered across, or bricked up during a past renovation because someone thought they were “letting the cold in”.
  • Flower beds, raised patios, or new driveways built up above the level of the airbricks, so soil and water sit right against the vents.
  • Airbricks half-buried by leaf litter, moss, or the gravel from a neighbour’s border.
  • Extensions or conservatories added to the back of the house that seal off one side of the void entirely, killing the cross-flow.
  • Rubble and old building debris left in the void after previous work, damming the air and holding moisture against the joist ends.

Any one of these can quietly push the void’s humidity up for years before the damage shows on the surface. By the time a board feels spongy underfoot, the joist beneath it may already be well into decay.

Reading the warning signs before you lift a board

You do not need specialist kit to get an early sense of trouble. A cold, stale, earthy smell that greets you when you open the front door on a wet day is a classic signal that the void is not clearing its moisture. Boards that feel slightly bouncy near the outside wall, cupped edges where each plank has curled up at the sides, or a line of dark staining and salt bloom along the bottom of the skirting all point the same direction. Peel back a corner of old carpet and press a screwdriver into a joist end near an external wall; if the timber crumbles or the blade sinks in easily, you are looking at rot rather than a simple surface issue.

It is worth lifting one board deliberately and shining a torch into the void. What you want to see is clean, dry-looking timber, a gap of clear air beneath the joists, and daylight or a draught at the airbricks. What you do not want is standing water, a tide mark on the sleeper walls, white fungal strands, or a void so packed with debris that you cannot see the far wall.

Getting the void healthy again

The good news is that most suspended floors can be brought back into good order without ripping everything out. The work usually follows a logical order. First, restore the ventilation: clear every airbrick, replace any that are cracked or blocked with modern clay or plastic vents of the same size, and add extra airbricks if the original spacing was too mean for the length of the wall. As a rough guide, vents should run roughly every couple of metres along the external walls, positioned to encourage air to travel across the void rather than stall in a corner.

Next, deal with ground levels. If soil, decking, or a patio has crept above the airbricks, it has to come down, or a periscope-style vent needs fitting to lift the opening clear of the ground. Then clear the void itself of rubble and organic matter so nothing is trapping water against the timber. Where the oversite is bare earth and the ground is persistently damp, laying a heavy-duty polythene membrane over the soil can cut the amount of moisture entering the void, though it must be done carefully so it does not simply pool water in low spots.

Only once the void is dry and moving air should you think about the finished floor. Fitting a beautiful engineered board or a fresh layer of insulation over an unresolved damp problem simply hides the fault and speeds up the decay underneath.

Where insulation and modern floors fit in

Plenty of Newcastle homeowners want to insulate a cold suspended floor, and that is entirely sensible for comfort and heating bills. The key is to insulate without strangling the ventilation. Insulation should sit between the joists, supported on netting or a breather membrane, with the airbricks and the void beneath left completely clear. Breathable insulation materials are generally kinder to an old floor than sealing everything in solid foam, because they let any incidental moisture pass through rather than trapping it. If you are moving to a new engineered or solid timber floor on top, that timber still needs to acclimatise to the room and the subfloor needs to test dry first.

The habit worth building is simple: treat the void as a living part of the house that needs air, not a dead space to be filled. Check the airbricks every autumn when the leaves come down, keep borders and gravel clear of them, and never let a well-intentioned bit of landscaping bury the very vents keeping your floor alive. Get the moisture under control first, and whatever you lay on top will have the dry, stable base it needs to last for decades rather than seasons.


Getting a Subfloor Flat and Level Before New Flooring Goes Down

Most flooring failures are not caused by the flooring at all. They are caused by what is underneath it. A laminate that clicks apart at the seams, a vinyl that telegraphs every lump like a topographic map, a solid board that rocks and taps under your heel — trace these back and you nearly always arrive at the same root cause: a subfloor that was never made properly flat and level before the new floor went down. Getting that base right is unglamorous work, but it is the part of the job that decides whether your flooring feels like a professional installation or a constant irritation.

Flat and level are not the same thing

The two words get used interchangeably, and that confusion causes real problems. Level means horizontal — a marble placed on it would not roll away. Flat means free of humps and hollows, regardless of whether the whole surface tilts. For most floor coverings, flat matters far more than level. A room can slope gently from one end to the other and a floating floor will lay across it perfectly happily, because the boards follow the plane. But put a sharp two-centimetre dip in the middle of an otherwise good floor and that same floating floor will bridge the hollow, flex every time it is walked on, and eventually crack or unclick at the joint.

Manufacturers publish tolerances for exactly this reason. A common specification for laminate and engineered flooring is no more than three millimetres of deviation under a two-metre straightedge. Tile has its own, tighter numbers. Before you buy anything, it is worth knowing what your chosen product demands, because that figure tells you how much preparation you are really signing up for.

Finding out how bad the subfloor really is

You cannot fix what you have not measured. The most reliable low-tech tool is a long aluminium straightedge — two metres is the standard — laid across the floor in every direction while you look for daylight underneath and slide a tape measure or a set of feeler gauges into any gaps. Work methodically across the whole room in a grid, marking the high spots and the hollows directly on the subfloor with a pencil or chalk. High points and low points need completely different treatments, so labelling them as you go saves confusion later.

For overall level, a long spirit level or a laser line around the perimeter tells you whether the room tilts and by how much. This matters most where the new floor meets a fixed feature — a run of kitchen units, a hearth, a doorway into a tiled hall — because a slope that is invisible in the middle of a room becomes very visible where a skirting or worktop should sit parallel to it.

Concrete subfloors and self-levelling compound

Ground floors in a lot of Newcastle housing, especially post-war semis and anything with a solid floor, are concrete or screed. These are forgiving to work with but rarely arrive flat. The standard fix for a concrete base with hollows and gentle undulations is a self-levelling compound: a fluid cementitious mix that is poured on, spread roughly with a trowel or gauge rake, and then flows out to find its own level before setting hard in a few hours.

The results are excellent when the preparation is done properly, and disappointing when it is skipped. The essential steps are hard to shortcut:

  • Clean the slab back to sound material — sweep and vacuum every trace of dust, and remove flaking paint, old adhesive, or laitance.
  • Prime the surface with the compound manufacturer’s primer. Bare concrete is thirsty and will suck the water out of an unprimed pour, causing it to dry powdery and debond.
  • Mix to the exact water ratio on the bag. Too much water weakens the compound and invites cracking; too little stops it flowing out flat.
  • Work quickly, because most compounds are walkable in a couple of hours but only remain fluid for fifteen or twenty minutes.
  • Check whether your depth needs one pass or two — many compounds have a maximum thickness per layer, and a deep hollow may need building up in stages.

Before any of this, make sure the concrete is genuinely dry. A new or recently laid slab holds enormous amounts of construction moisture, and pouring a floor over it before it has dried is a slow-motion disaster. A moisture test, or at minimum a taped-down plastic sheet left overnight to check for condensation, is cheap insurance.

Timber subfloors and overboarding

Suspended timber floors and chipboard bases call for a different approach, because you cannot pour a wet compound over springy boards without it cracking. Here the usual routes are mechanical. Individual boards that have cupped or sprung can be screwed back down or planed level. Small localised dips can be packed with hardboard or thin ply shims. But where a timber floor is generally uneven across its whole area, the cleanest solution is to overboard the lot with a layer of plywood or hardboard, screwed down at close centres so it pulls flat and creates a fresh, uniform surface.

Ply overlay does two jobs at once: it evens out the plane and it stiffens a bouncy floor so the covering above is not flexing with every footstep. The thickness matters — too thin and it simply follows the humps beneath it rather than spanning them. When you screw it down, fix on a tight grid rather than just around the edges, so the whole sheet is drawn into contact with the boards. Latex-based levelling compounds designed for flexible substrates exist too, and can be feathered over a ply base to take out the last few millimetres before a vinyl or tile goes down.

Why the extra day is always worth it

The temptation, especially near the end of a project when the new flooring is stacked in the hallway and everyone is impatient, is to lay it and hope the imperfections settle. They never do. A hollow does not fill itself, and a hump does not flatten under foot traffic; it just becomes the point where the floor wears through first. Spending an extra day getting the base flat is the difference between a floor that still looks and feels solid in fifteen years and one that develops squeaks, gaps, and lifting seams inside the first winter. Treat subfloor preparation as part of the flooring, not a chore that comes before it, and the finished result will reward the patience every single day you walk across it.

Bringing Original Pine Floorboards Back to Life

Underneath the carpet in a great many Newcastle terraces lies something better than anything you could buy today: original pine floorboards, cut from slow-grown timber, wide, and already more than a century into their working life. Homeowners often assume these tired, paint-spattered boards need ripping out and replacing. In the vast majority of cases they do not. With patient refinishing, the same floor that has been hidden for decades becomes the warm, characterful centrepiece of a room — and it costs a fraction of a new engineered floor while keeping a genuine piece of the house’s history in place.

Deciding whether the boards are worth saving

Before committing to the work, it pays to assess honestly what you are dealing with. Lift a corner of the carpet in a couple of places and look at the overall condition. Surface grime, old paint, dark varnish, and scuffing are all cosmetic and come off during sanding. What you are really checking for is structural soundness: boards that are split from end to end, sections chewed out by past plumbing runs, woodworm damage that has turned the timber to powder, or widespread rot near an external wall. Isolated damaged boards can be swapped out for reclaimed pine of a similar age and width, so a handful of bad planks is not a reason to abandon the project.

Check the thickness too. Original boards are usually generous, but if a floor has been sanded aggressively once or twice before, there may not be enough timber left to take another pass without exposing the fixing nails. Run your eye along the surface for the tops of nails or screws standing proud — every one of those has to be punched below the surface before a sander touches the floor, or it will tear the abrasive belt to shreds and score a deep line across the boards.

Preparing the floor before any sanding

The preparation stage is where a good result is actually won. Rushing straight to the sander guarantees problems. Work methodically through the room:

  • Punch every nail head three or four millimetres below the surface with a nail punch, and countersink any proud screws.
  • Refix loose or squeaking boards, ideally with screws that pull them tight to the joist rather than nails that will work loose again.
  • Check underneath for pipes and cables before driving any new fixing — a lifted board and a torch save a very expensive mistake.
  • Replace any boards that are beyond saving with reclaimed timber of matching width, letting the replacements acclimatise in the room first so they do not shrink after fitting.
  • Sweep and vacuum thoroughly, because a single loose stone dragged under a sanding belt will gouge the whole floor.

This is also the moment to decide what to do about the gaps. Older pine floors almost always have gaps between the boards where the timber has shrunk over the years, and those gaps let draughts up from the void below. You can leave them for a rustic look, fill them with thin slivers of matching pine glued in, or use a flexible filler for the finer ones. Reclaimed pine slivers give the most durable and least visible result; a rigid filler tends to crack and pop out as the boards move seasonally.

Sanding without ruining the grain

Floor sanding is a discipline in its own right, and the machines are powerful enough to do real damage in seconds if handled badly. A drum or belt sander does the main field of the floor, while a smaller edging sander gets into the perimeter the big machine cannot reach. The cardinal rule is to keep the machine moving whenever the drum is in contact with the floor. Let it dwell in one spot for even a moment and it will dig a hollow that no amount of later work will fully disguise.

Work through the grits in sequence rather than trying to jump straight to a fine finish. A typical progression starts coarse to strip off the old finish and level the worst of the cupping, then moves through a medium grit, and finishes fine to leave a smooth surface ready to take a coating. Sand in the direction of the grain, following the length of the boards; sanding across the grain leaves scratches that only become glaringly obvious once the finish goes on and catches the light. Between the coarse and final passes, vacuum thoroughly so grit from one stage does not scratch the next. Take your time on the edges, because a heavy hand with the edging sander is the most common way to leave a visible scalloped line around the perimeter of an otherwise beautiful floor.

Choosing a finish that suits the room

Once the floor is sanded clean and dust-free, the finish you choose changes both its look and how it copes with daily life. There are three broad options, each with its own character. A hard-wax oil soaks into the timber and leaves a natural, low-sheen surface that feels warm and can be patch-repaired in a worn area without redoing the whole floor. A polyurethane lacquer sits on top as a tougher film, giving the best protection in a busy hallway or a house with dogs, but when it eventually wears through it needs sanding back and recoating entirely. A traditional oil-and-wax combination gives the most authentic period look but demands the most upkeep.

Newcastle’s climate is worth a thought here. Original pine boards over a suspended void will move with the seasons as humidity swings, expanding in a damp winter and shrinking in a dry, heated spell. Oiled finishes tend to cope with that movement more gracefully than a hard film lacquer, which can show hairline cracks along the joints as the boards shift. Whatever you choose, apply thin coats, let each dry fully, and lightly key the surface between coats so the next one bonds properly.

Living with a restored floor

A refinished pine floor rewards a little ongoing care. Felt pads under furniture legs stop point loads from denting the softwood, which is noticeably softer than oak. A doormat at the front catches the grit that would otherwise act like sandpaper underfoot. Sweep or vacuum regularly rather than letting abrasive dust build up, and clean with a barely damp mop and a pH-neutral product rather than soaking the boards. Every few years an oiled floor can be freshened with a maintenance coat in an afternoon, no sanding required. Done this way, a floor that started life in a Victorian builder’s yard can keep looking its best for another hundred years — proof that the best flooring in the house was often there all along, waiting under the carpet.

Choosing and Fitting Flooring Over Underfloor Heating

Underfloor heating has gone from a luxury to a common request in Newcastle renovations, especially in kitchen extensions and bathroom refits where wall space for radiators is scarce. It delivers a gentle, even warmth that a conventional radiator cannot match, and it frees up walls entirely. But the floor covering laid over it is not an afterthought — it is part of the heating system. Choose the wrong material, or fit the right one badly, and you end up with a floor that heats poorly, cracks, gaps, or lifts. Getting the pairing right is what separates an underfloor heating installation that quietly delights for years from one that becomes a source of constant complaint.

Why the floor covering is part of the system

Every floor covering resists the passage of heat to some degree, and that resistance is measured as a thermal resistance value, or tog rating in the flooring world. The heat generated under the floor has to travel up through the covering before it reaches the room, so the more insulating the covering, the harder the system has to work and the less responsive it becomes. Manufacturers of underfloor heating generally recommend that the combined thermal resistance of the floor covering and any underlay stays below a set threshold, often quoted around 2.5 tog for the whole build-up. Go above that and the system may never reach the room temperature you want, or it will run so hot beneath the surface that it risks the covering above.

This single principle explains most of the material choices that follow. It is not that thick, cosy floors are banned over underfloor heating; it is that their insulating properties fight the very thing you installed the heating to do.

Which materials work best

Some floor coverings are naturally suited to underfloor heating, and some are best avoided. Broadly, the denser and more thermally conductive the material, the better it performs:

  • Tile and natural stone are the ideal partners. They conduct heat readily, store it well, and are completely stable at the temperatures involved — which is exactly why they dominate bathrooms and kitchens.
  • Luxury vinyl tile and quality laminate designed for underfloor heating perform well, provided the manufacturer confirms compatibility and you respect their maximum surface temperature.
  • Engineered timber is the sensible wood choice, because its cross-layered construction stays far more stable than solid boards when warmed and cooled repeatedly.
  • Solid timber is the riskiest option; wide solid boards can shrink, gap, and cup as the heat drives moisture out of them, and many manufacturers will not warranty solid wood over heating at all.
  • Thick carpet with a heavy underlay is usually the worst match, because its insulating value can single-handedly push the build-up past the recommended tog limit.

None of this means you cannot have a warm-looking wooden floor in a heated room. It means choosing engineered board over solid, checking the product’s stated compatibility, and keeping any underlay thin and thermally rated for the job.

Getting the installation right

Even the perfect material will fail if it is fitted without regard for the heat moving through it. The most important habits are about accommodating movement and ensuring good contact between the heat source and the covering. Air gaps are the enemy: a void trapped under a tile or board acts as insulation and creates hot spots, so beds of adhesive need to be full and continuous rather than dotted. With tile, that means back-buttering and a solid bed so there are no hollow pockets under the surface.

Timber and click-fit floors expand and contract more over a heated subfloor than they would in an unheated room, so the expansion gap left around the perimeter and at every doorway matters even more than usual. Skimp on that gap and a warmed floating floor will grow until it jams against the walls and buckles in the middle. For glued timber over heating, the adhesive itself needs to be one rated for the application, because ordinary adhesives can become brittle or soften at the temperatures involved.

The subfloor also has to be genuinely dry before anything goes down. A wet screed over new pipes holds a large amount of construction moisture, and sealing a floor over it traps that water where it will later cause problems. Fresh screeds need weeks to cure, and the heating itself should not be used to force-dry them quickly.

The commissioning process most people skip

Here is the step that gets missed most often, and the one that causes the most avoidable damage: the first heat-up. A new underfloor heating system, and any fresh screed over it, must be brought up to temperature slowly and deliberately before the finished floor is subjected to full working heat. The usual routine is to run the system at a low temperature first, then raise it by a small increment each day over a week or more until it reaches its normal operating point, and to do this before the floor covering is even laid where the sequence allows.

Once the floor is down and in daily use, the same gentleness applies at the start of each heating season. Blasting a cold floor straight to maximum in the first frost of autumn shocks the covering with a rapid temperature swing, and it is exactly this kind of sudden change that opens up gaps between timber boards or stresses grout lines. Bringing the system up gradually over a few days lets the whole build-up expand together at a pace it can tolerate. A programmable thermostat that avoids sharp overnight drops and steep morning ramps does the same job automatically and protects the floor over its whole life.

Matching the system to the room

Finally, it is worth thinking about the room as a whole rather than just the floor surface. A well-insulated modern extension with good glazing holds the warmth an underfloor system produces, so the heating runs efficiently and the floor stays at a comfortable, moderate temperature. An older, draughtier room loses heat faster, which tempts people to run the floor hotter to compensate — and that higher surface temperature is precisely what pushes timber and some vinyls beyond what they can handle. Improving the room’s insulation and draughtproofing first means the floor can run cooler and last longer while still keeping the space warm. Treated as a single connected system — subfloor, heating, covering, and room — underfloor heating in a Newcastle home delivers exactly the quiet, even comfort it promises, and the floor above it stays flat, tight, and sound for the long haul.

A Quick Checklist Before You Visit a Flooring Showroom

Walking into a flooring showroom can be overwhelming. Bright lights, endless samples and an eager salesperson make it easy to forget what you actually came for. Use this quick checklist to keep your visit focused and avoid an expensive impulse.

Know your room first

Measure your space before you go and note any tricky areas such as alcoves, doorways and radiators. Take a rough sketch with you so quotes are based on reality rather than guesswork.

Ask the right questions

  • What is the total cost including underlay, fitting and removal of the old floor?
  • How is this floor finished, and how should I clean it?
  • Is it suitable for underfloor heating or wet rooms?
  • What guarantee comes with the product and the fitting?

Take samples home

Showroom lighting flatters everything. A sample that looks perfect under bright spotlights can feel quite different in your own home, so always view it in daylight and in the evening before you commit.

Do not be rushed

A limited time offer is rarely as limited as it sounds. Sleep on any significant decision. A reputable supplier will respect your need to think it over.

Trust your room, not the showroom

The best floor is the one that suits your home, your habits and your budget, not the one with the boldest display. Keep this checklist in mind and you will leave with confidence rather than regret.

Flooring Questions We Get Asked Most Often

We receive the same handful of questions again and again, so we have gathered the most common ones here with clear, no nonsense answers. If yours is not covered, do feel free to get in touch.

Can I lay new flooring over my existing floor?

Sometimes. Laminate and luxury vinyl can often go over a sound, level existing floor, but you should never lay over a surface that is damaged, damp or uneven. When in doubt, lift the old floor and start fresh.

Is underfloor heating compatible with wood?

Engineered wood is well suited to underfloor heating, while solid wood generally is not. Always check the manufacturer’s maximum surface temperature and let the system warm up gradually.

How long does fitting take?

A single average room can often be completed in a day, though preparation, awkward shapes and drying times can extend this. Never rush the curing or settling stages.

Which floor is best for a busy hallway?

Luxury vinyl is hard to beat here. It is waterproof, hard wearing and forgiving of the mud and water that come through the front door, especially in our climate.

Do I really need underlay?

In almost all cases, yes. Underlay improves comfort, reduces noise and helps level minor imperfections. Skipping it to save a few pounds is a false economy.

Engineered Wood vs Solid Wood: Which Should You Choose?

Engineered and solid wood are often spoken about as if they were the same thing, but the differences matter when it comes to where and how you can use them. This short comparison should help you decide which suits your home.

Construction

Solid wood is exactly that: a single piece of timber through and through. Engineered wood uses a real wood veneer bonded to a stable core of plywood layers, which gives it far greater resistance to movement.

Stability and heating

Because of its layered core, engineered wood copes much better with underfloor heating and changing humidity. Solid wood is more prone to expansion and contraction, making it less suitable for kitchens, conservatories and heated floors.

Lifespan and refinishing

  • Solid wood: can be sanded and refinished many times, often lasting generations.
  • Engineered wood: can usually be refinished once or twice depending on veneer thickness, which is plenty for most homes.

Cost

Engineered wood often offers the look of premium timber at a more approachable price, while wide solid boards in rare species command the highest prices.

Our verdict

For most North East homes we lean towards engineered wood for its stability and value, reserving solid timber for stable, well heated rooms where its character can be enjoyed for the long term.

How to Lay a Laminate Floor in Five Steps

If you have decided to try laying a laminate floor yourself, you are in good company. Modern click systems have made it one of the most achievable home projects, provided you respect a few key steps. Here is the straightforward sequence we recommend for a tidy, lasting result.

Step one: let it settle

Bring the planks into the room and leave them flat in their packaging for at least forty eight hours. This lets the boards adjust to the temperature and humidity of the space, which prevents gaps and bulging later.

Step two: prepare the subfloor

Your floor will only ever be as good as the surface beneath it. Make sure the subfloor is clean, dry and level. Lay a suitable underlay to smooth out minor imperfections, cushion your step and help with sound.

Step three: plan your layout

Measure the room and work out the width of your final row before you begin. A board that ends as a thin sliver looks awkward, so adjust your starting row to balance the edges. Always lay planks running away from the main light source for the cleanest appearance.

Step four: leave an expansion gap

This is the step most beginners forget. Laminate expands and contracts, so leave a small gap of around ten millimetres around every wall and fixed object. Spacers make this easy, and the gap disappears neatly under your beading at the end.

Step five: finish neatly

Once the floor is down, remove the spacers and fit your skirting or beading to hide the expansion gap. Use threshold strips at doorways for a professional join. Stand back, admire the work, and enjoy a job done properly.

The Complete Guide to Caring for Hardwood Floors

A good hardwood floor can last for decades, but only if you treat it as the natural material it is. Timber responds to heat, moisture and wear, and a little routine care goes a long way towards keeping it looking its best. This pillar guide brings together everything we wish every homeowner knew before they laid their first wooden floor.

Understand your finish

Before you clean anything, find out how your floor is finished. Oiled floors sit into the grain and can be spot repaired, while lacquered floors carry a protective surface film that should never be treated with oil. Using the wrong product is the quickest way to ruin an otherwise healthy floor, so when in doubt, check with the supplier or test in a hidden corner first.

Daily and weekly habits

Most wear comes from grit, not footsteps. Fine particles act like sandpaper underfoot, so regular sweeping or vacuuming with a soft brush head is the most valuable thing you can do. Place mats at exterior doors to catch the worst of the dirt, and encourage shoes off where you can. These small habits protect the finish far more effectively than any expensive product.

Cleaning without causing damage

Water is the natural enemy of wood. Never mop a timber floor with a soaking cloth or leave standing water to dry. Instead, use a barely damp microfibre mop and a cleaner designed specifically for wooden floors. Wipe spills the moment they happen, and avoid steam mops entirely, as the heat and moisture together can lift boards and cloud the finish.

Managing humidity

  • Aim to keep indoor humidity reasonably stable across the year, as sudden swings cause the gapping and cupping people often blame on poor fitting.
  • In dry winter months, central heating can shrink boards slightly; this usually settles as conditions even out.
  • In damp coastal homes, good ventilation helps timber stay calm and flat.

Dealing with scratches and dents

Minor surface scratches on oiled floors can often be buffed out and re oiled in minutes. Lacquered floors are trickier and may need a professional touch for anything deep. For dents, a slightly damp cloth and a warm iron can sometimes raise crushed fibres, though this works best on raw or oiled timber rather than sealed surfaces.

Protecting against everyday life

Felt pads under furniture legs are inexpensive and prevent the ugly drag marks that appear when chairs are pushed back. Lift, do not slide, anything heavy. Use rugs in high traffic runs such as hallways, but choose breathable backings, since rubber mats can trap moisture and discolour the wood beneath them.

Knowing when to refinish

Even the best kept floor eventually looks tired. The good news with solid and thicker engineered boards is that a full sand and refinish brings them back to life. As a rough guide, a busy family floor might need this every seven to ten years, while a quiet room may go far longer. Plan for it rather than dreading it, because a freshly refinished floor often looks better than the day it was laid.

The long view

Caring for a hardwood floor is less about effort and more about consistency. Keep grit at bay, keep water away, manage your humidity and deal with small problems before they grow. Do that, and your floor will reward you with a warmth and character that no synthetic alternative can match.

Choosing the Right Flooring for a North East Home

Choosing flooring for a North East home is rarely about looks alone. Between damp coastal air, cold winters and the relentless traffic of family life, the floor you pick has to cope with a great deal before it ever has to look smart. This guide walks through the main options available today and explains, honestly, where each one earns its keep and where it tends to disappoint.

Readers who want to dig deeper can find more at Blog-suckhoe.

A practical overview of this subject is offered by this guide as well.

Solid hardwood

Solid timber remains the benchmark many people aspire to, and for good reason. A well laid oak or walnut floor feels warm underfoot, ages gracefully and can be sanded back several times across its life. The trade off is sensitivity to moisture. In older Tyneside properties with variable humidity, solid boards can cup or gap as the seasons change, so they suit stable, well heated rooms far better than draughty hallways or kitchens prone to spills.

Engineered wood

For most homeowners, engineered wood is the sensible middle ground. A real timber veneer sits on a stable plywood core that shrugs off the small movements that trouble solid boards. You get the genuine look and feel of wood with far better tolerance of underfloor heating and changing conditions. It is our most frequently recommended choice for living rooms and open plan spaces.

Laminate and luxury vinyl

Laminate has improved enormously and now offers convincing wood effects at a modest price, making it ideal for bedrooms and low traffic rooms on a budget. Luxury vinyl, meanwhile, has become the practical favourite for kitchens, bathrooms and busy entrances. It is genuinely waterproof, warm underfoot and forgiving of the muddy boots and wet umbrellas that come with North East weather.

Matching the floor to the room

The single biggest mistake we see is buying one floor for the whole house. A material that performs beautifully in a calm lounge may be a poor choice for a hallway that takes the brunt of the front door. Think room by room. Consider how much moisture each space sees, how much traffic it carries, and whether children or pets will be using it daily.

Budgeting realistically

It is tempting to focus on the headline price per square metre, but the real cost includes underlay, beading, fitting and the removal of your old floor. A cheaper board that needs replacing in five years is no bargain against a mid range product that lasts twenty. We always encourage readers to think in terms of cost over the lifetime of the floor rather than the day they buy it.

A sensible starting point

If you are unsure, engineered wood in the main living areas and luxury vinyl in the wet rooms will serve the vast majority of North East homes extremely well. From there you can refine your choices to suit your taste and budget. Take samples home, view them in your own light at different times of day, and never decide on the strength of a showroom alone.